Components
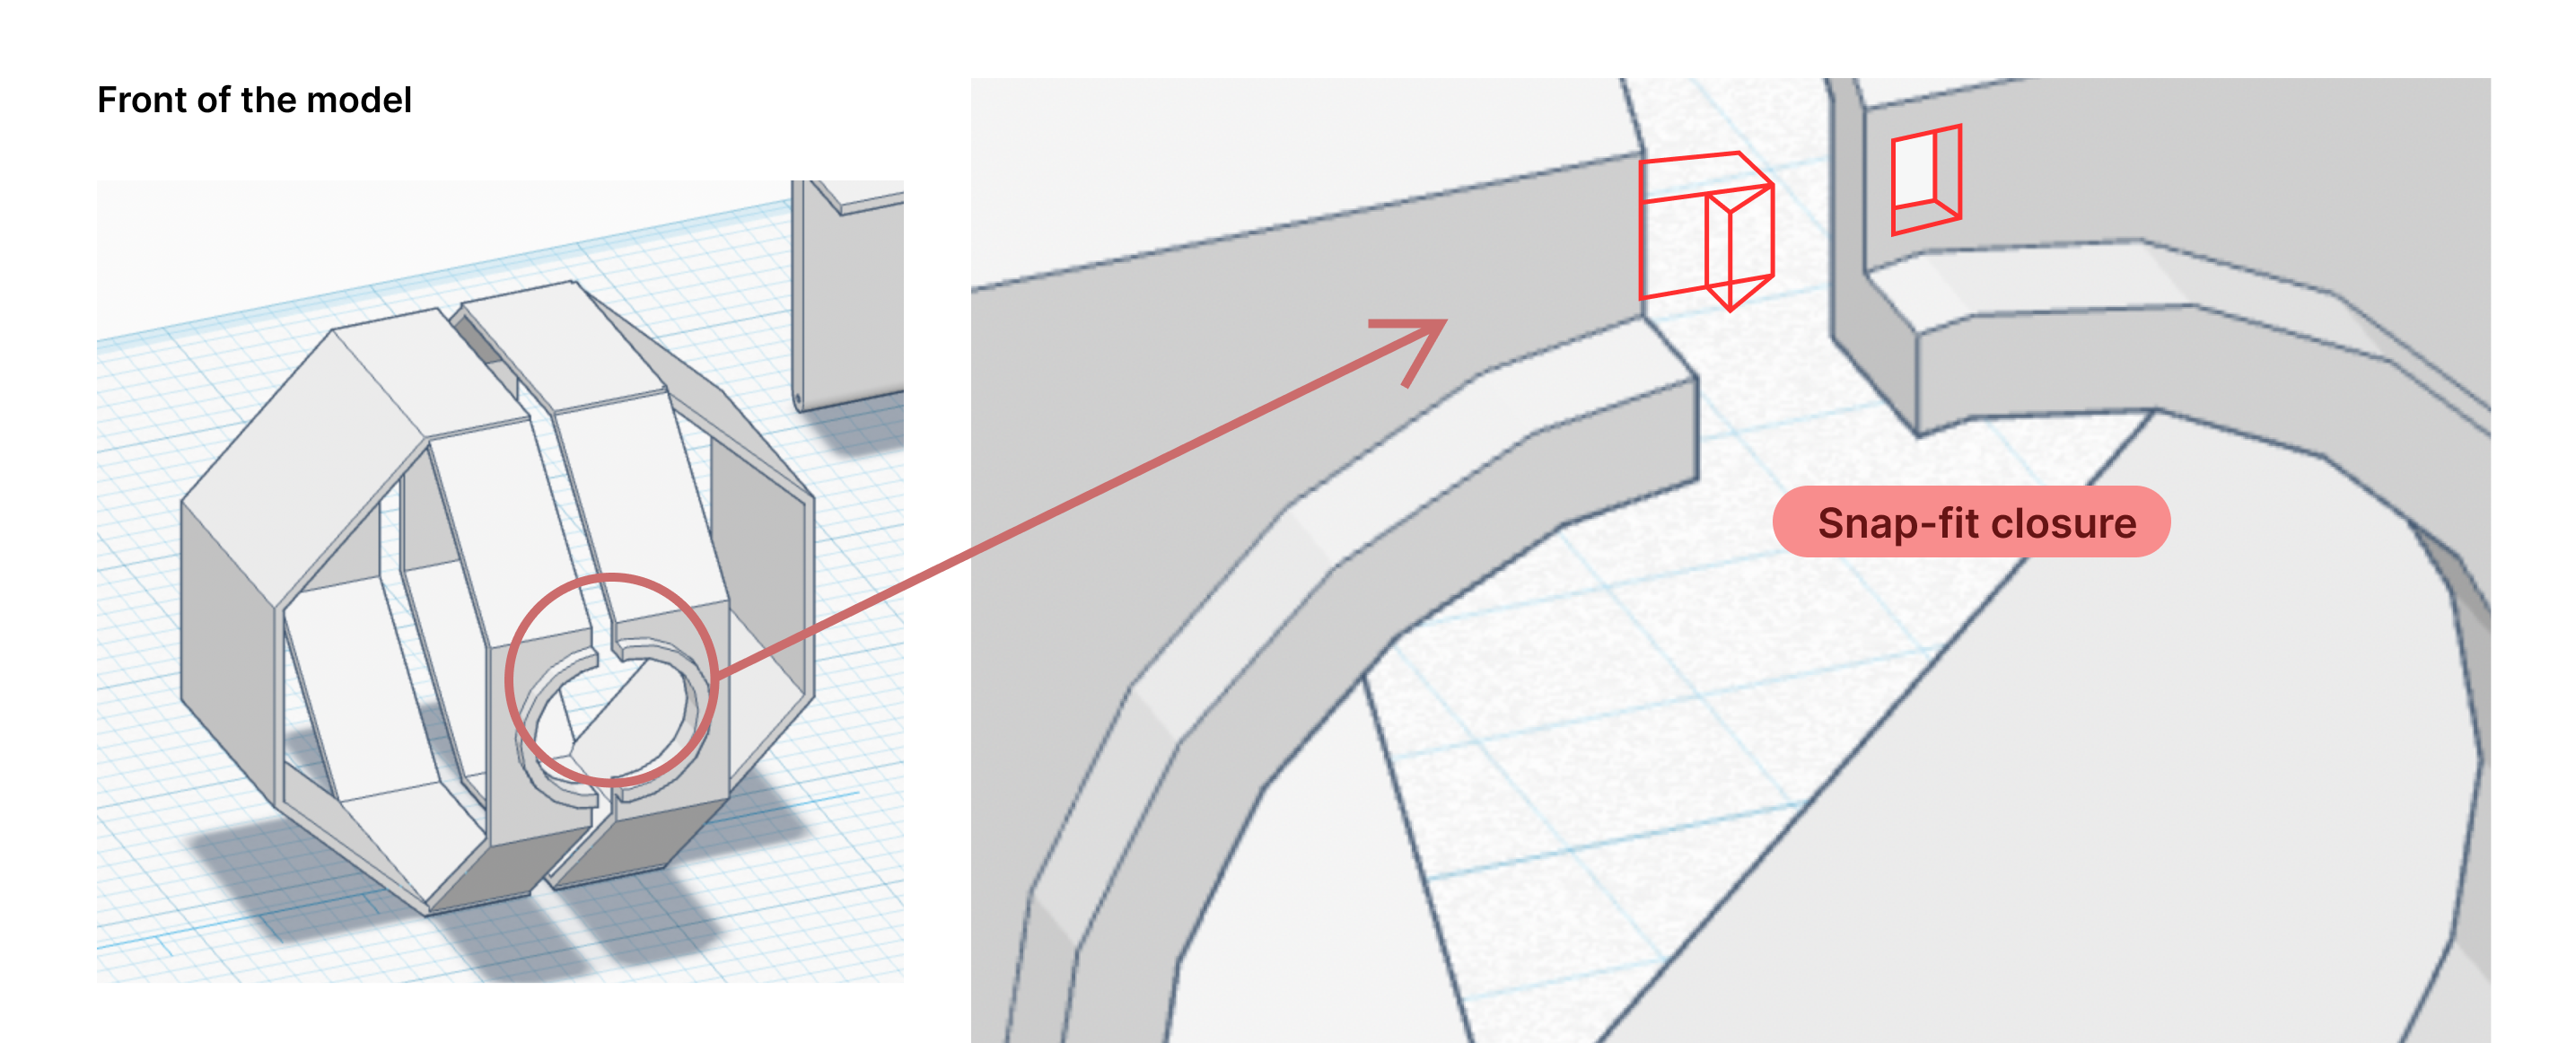
We’ll be 3D printing 2 main parts for the body of the video camera, and each part will contain a
snap-fit joint (the cantilever), consisting of a protrusion at one end of the beam and a
structural support at the other end, which is inserted into a cut-out or slot and deflects upon
insertion. We’ll also be printing 3 more parts for the mounting base of the video camera’s body,
two surfaces connected by a thin rod through the ends of each mount part, acting as a hinge.
We'll also be adding a magnetic strip at the base of the video camera's body and the face of the
camera mount.
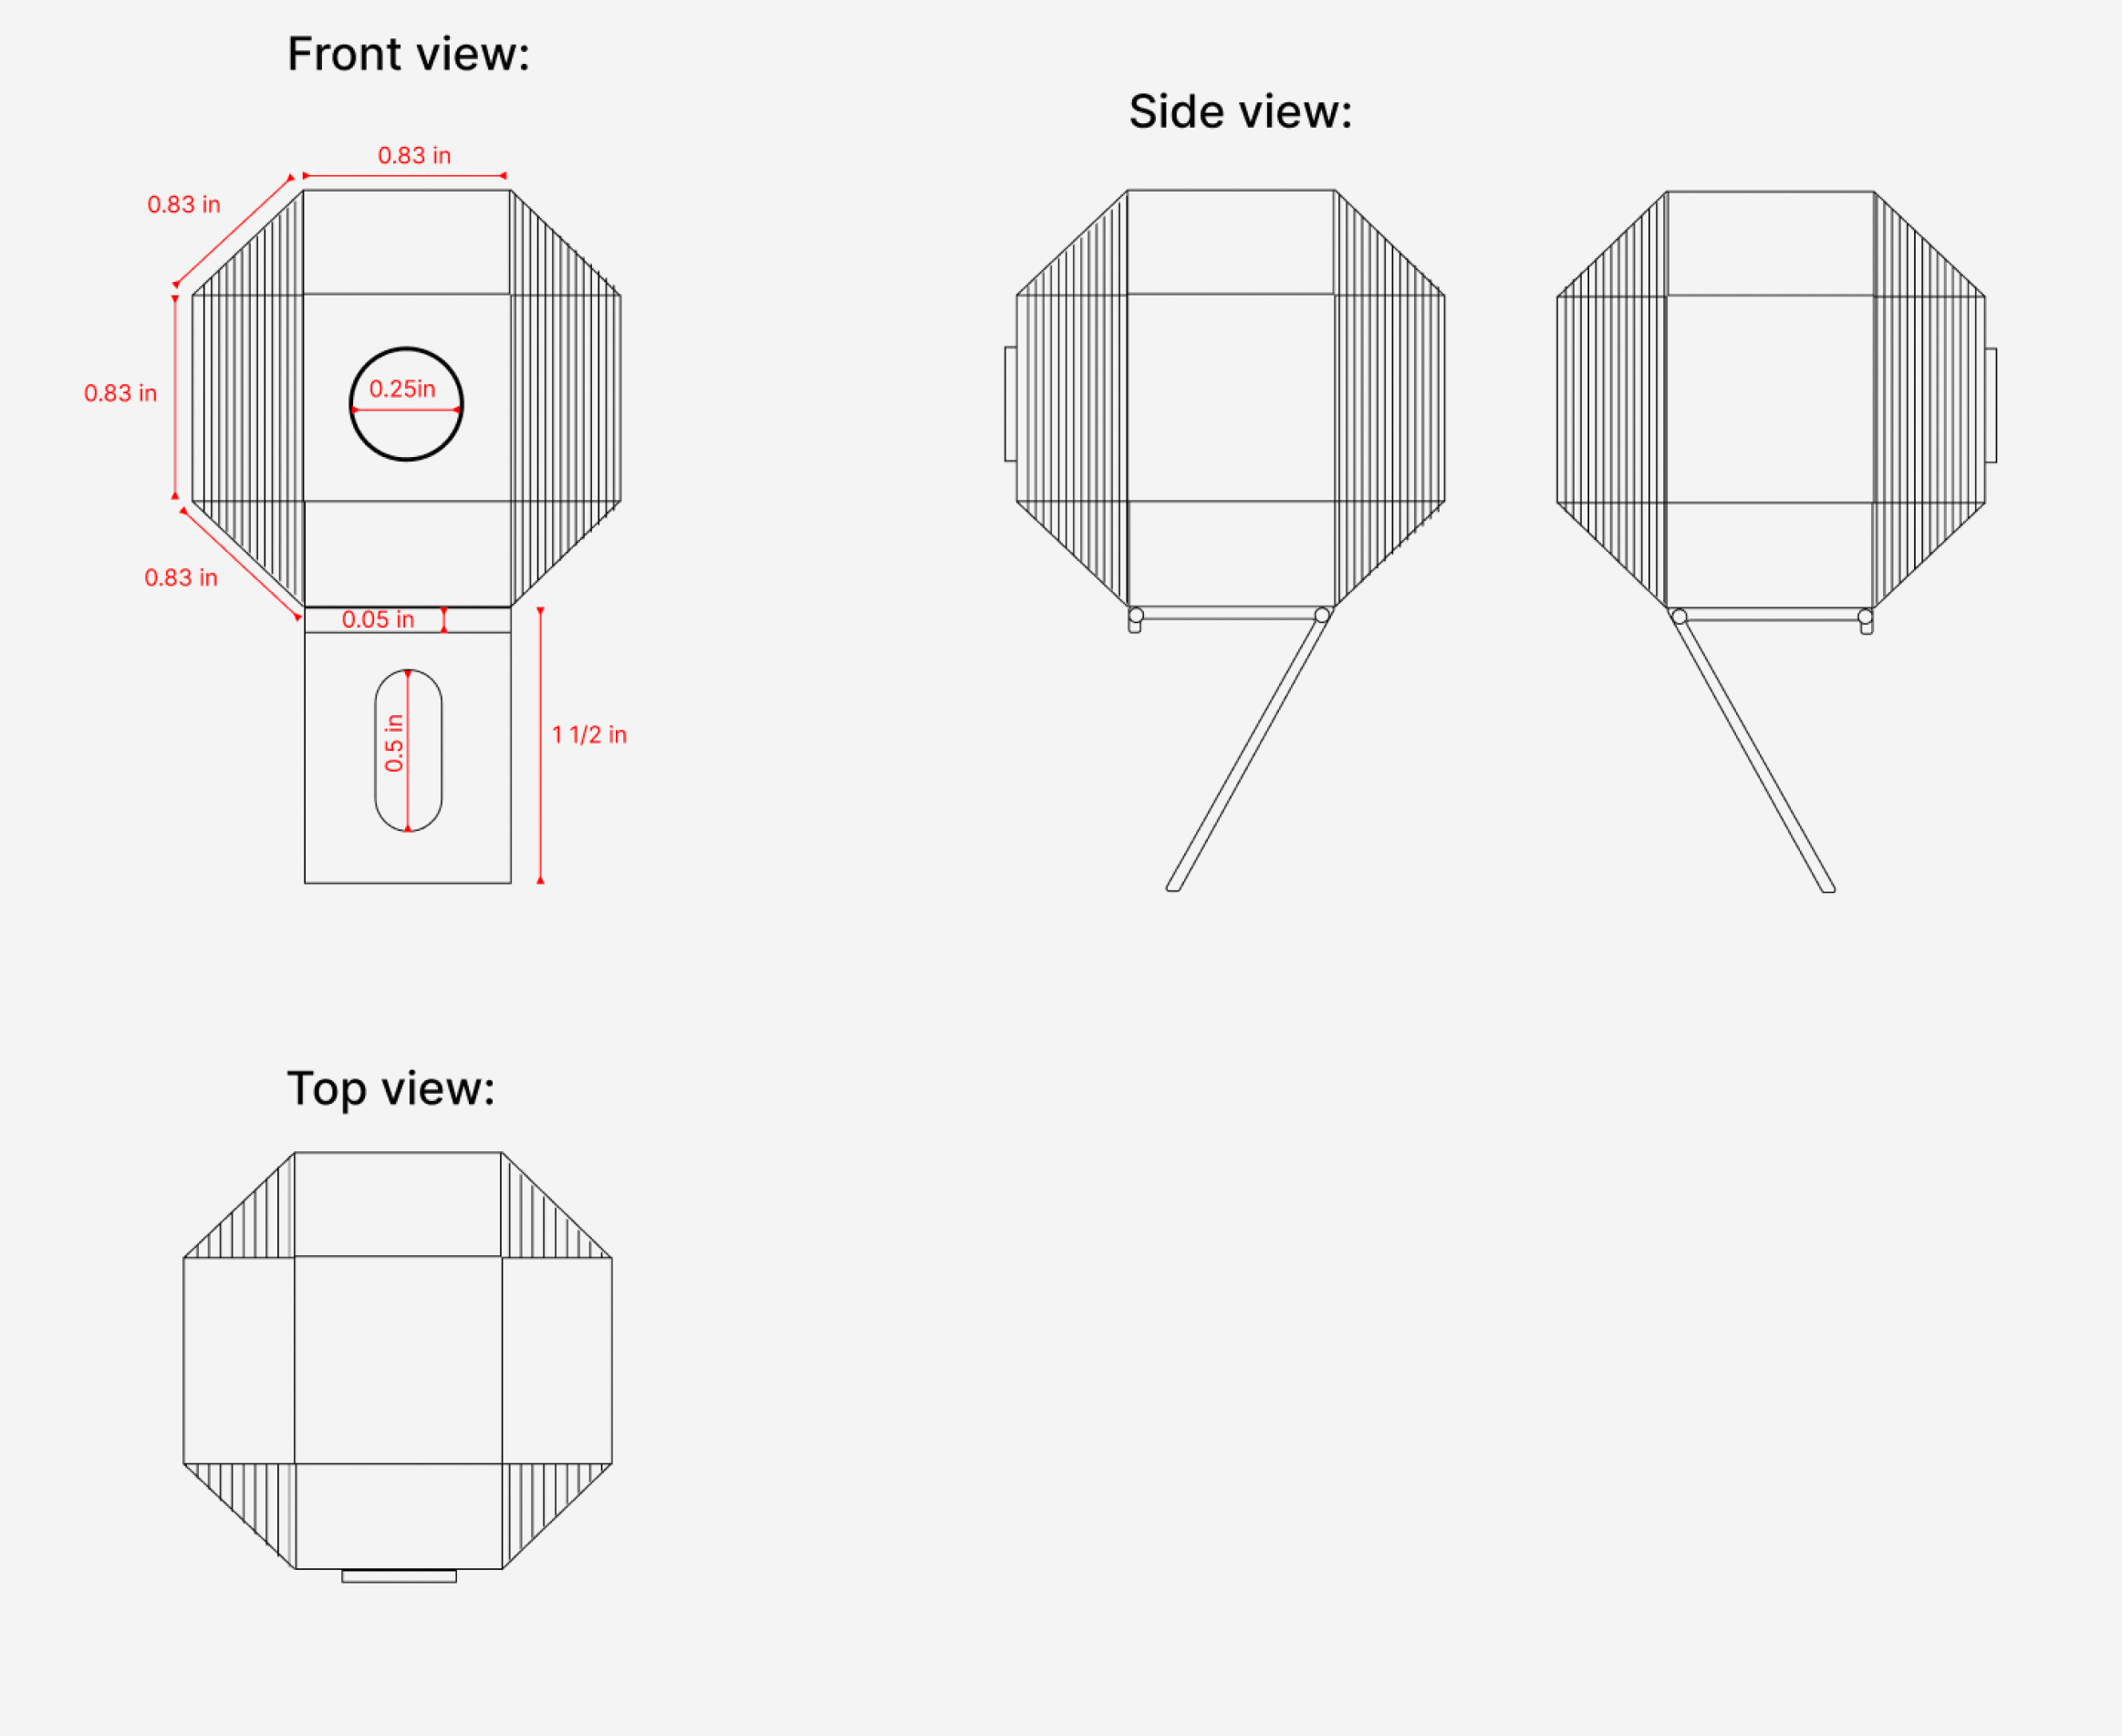
Dimensioned Drawings
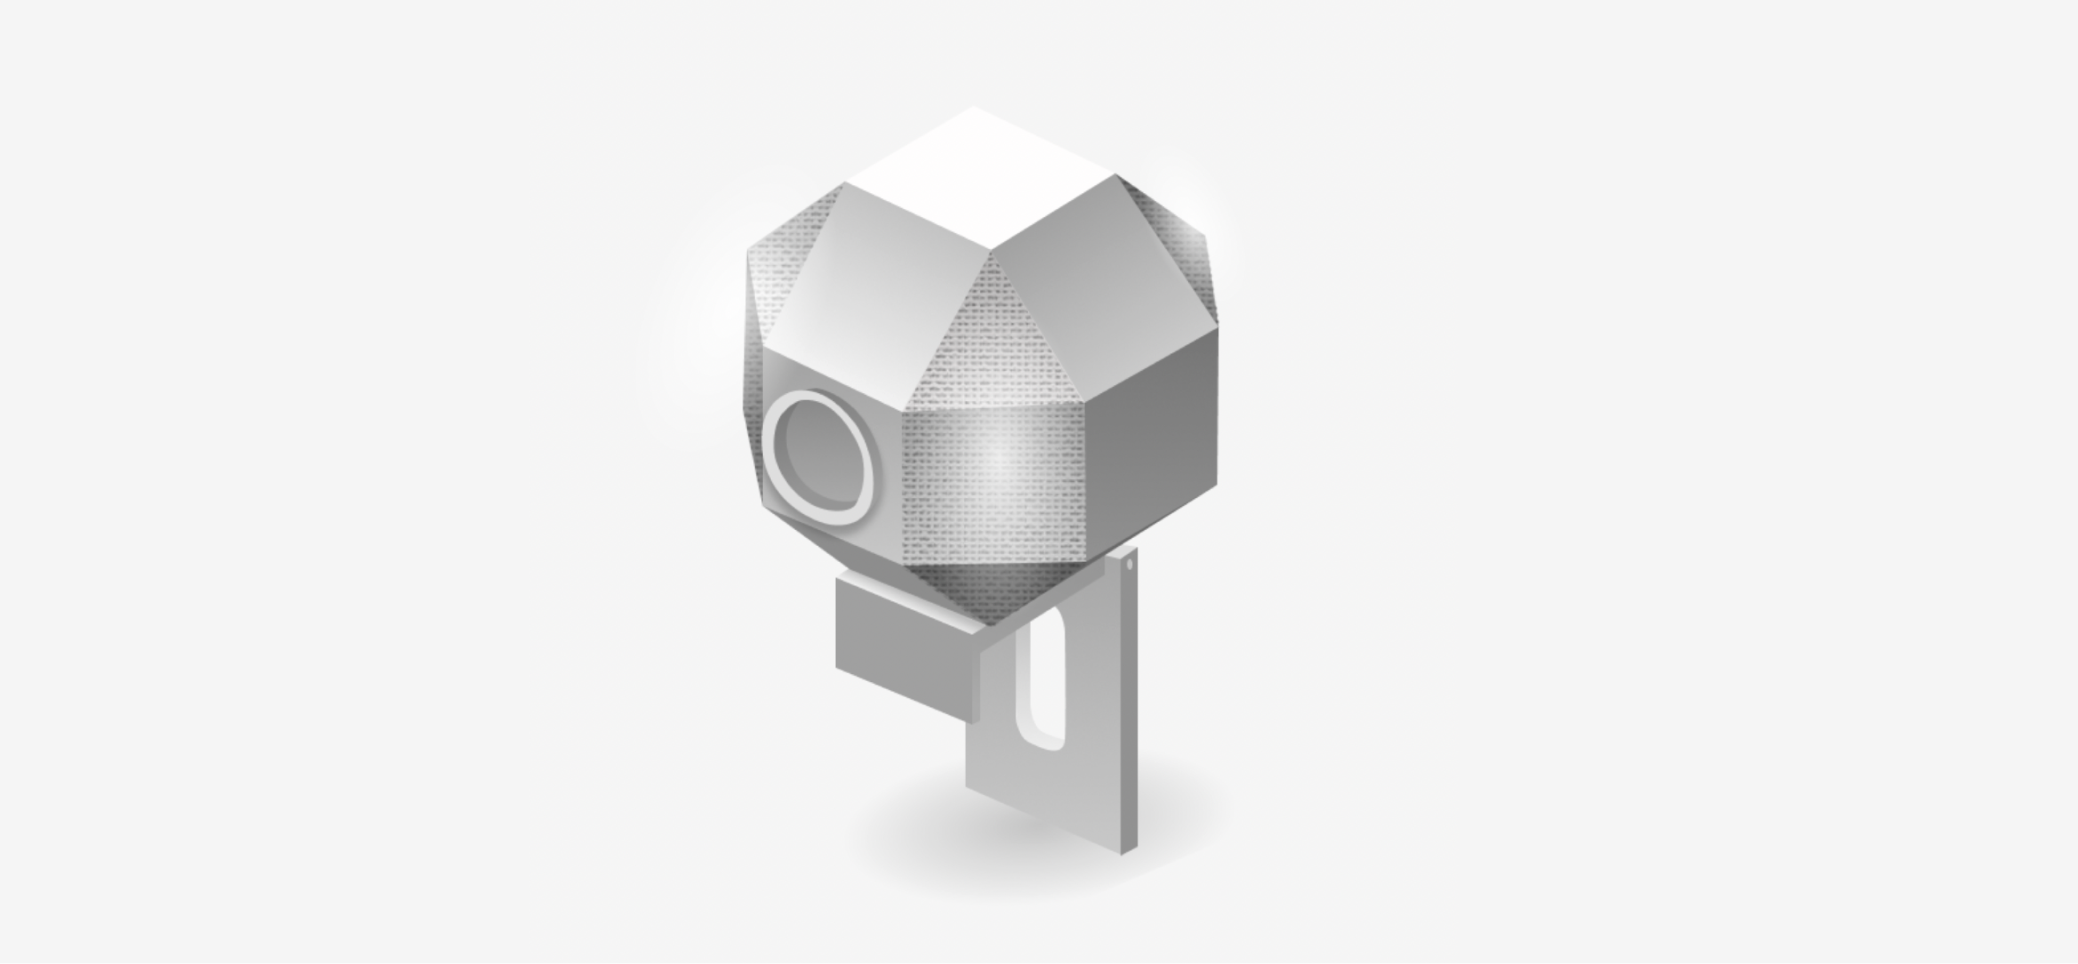
Rendering
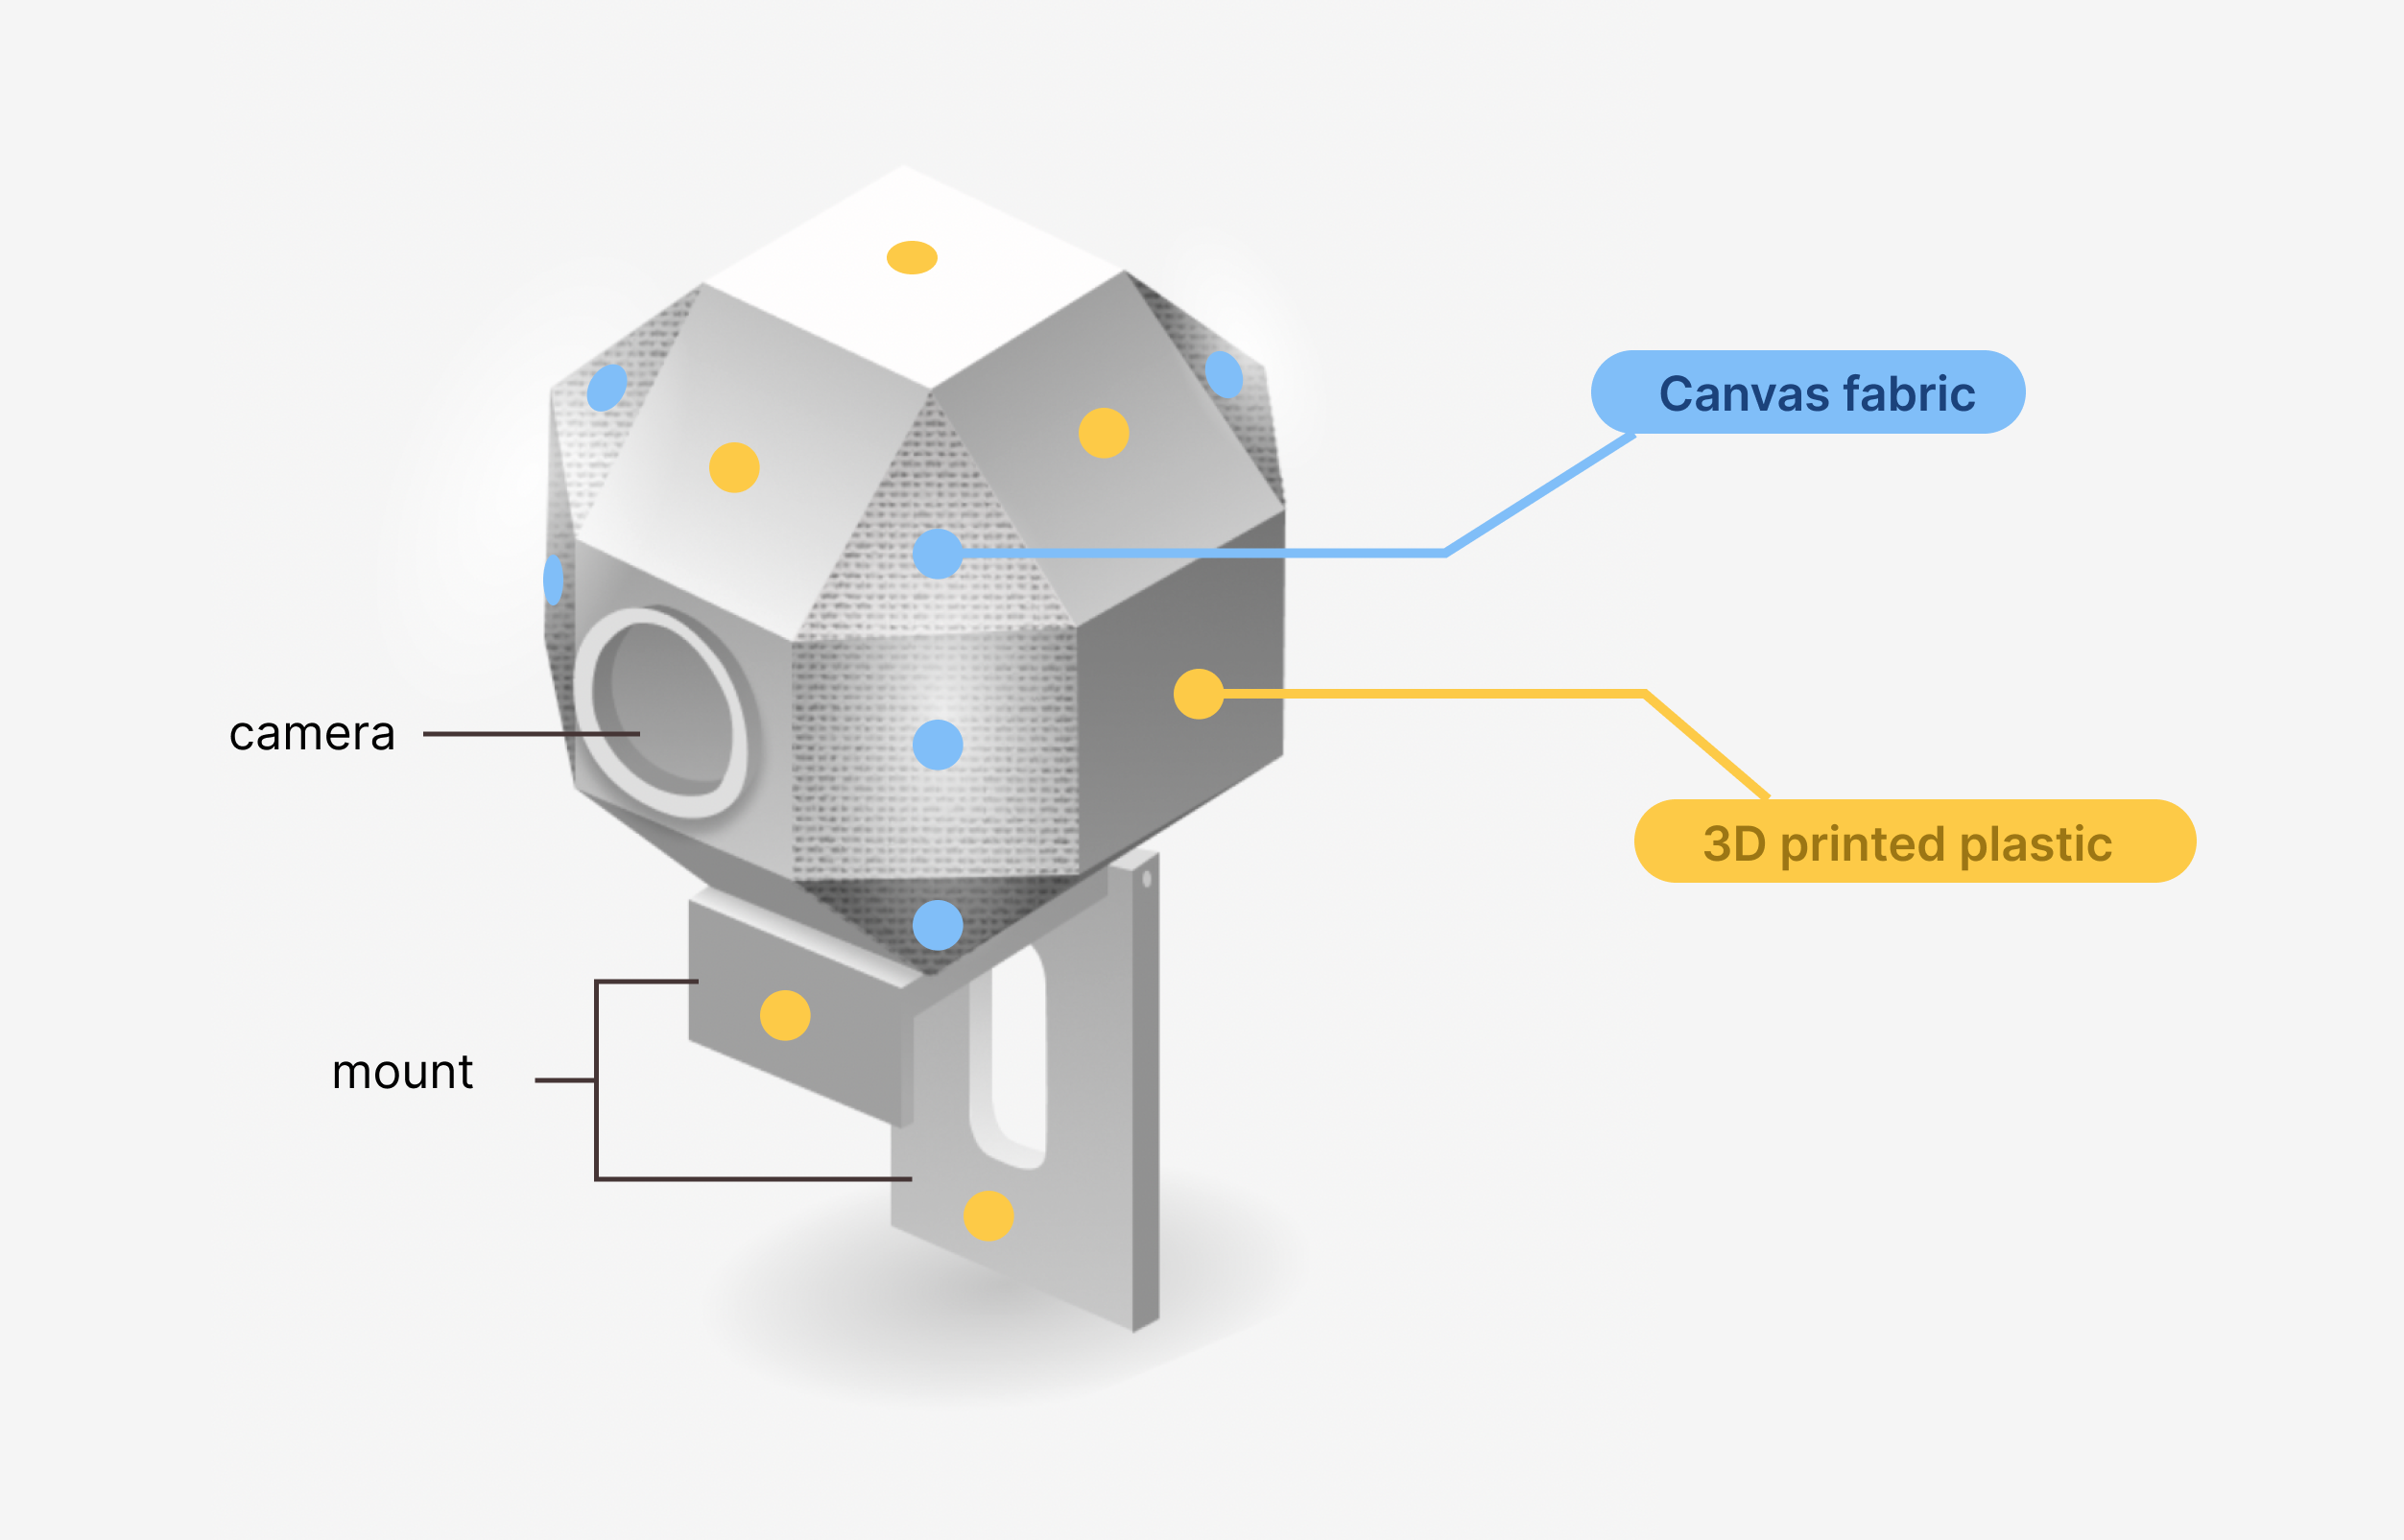
We are using a 3D plastic printing material for the skeleton of the video camera, and canvas fabric for 4 side faces of the body where there are gaps leftover.
Fabrication
We are using a 3D-printed ABS plastic to serve as the skeleton of the video camera. The open faces of the structure will be covered with cotton canvas fabric. The fabric will be measured and cut by hand during assembly. We will be using Methylene Chloride to dry wield the plastic components together.
Interaction
In regards to interaction, we have repurposed the camera to be used in a single upright position rather than having it attachable magnetically from its multiple faces. Our team found that our persona may not have many magnetic surfaces that would be readily available to mount the webcam. Hence, we have decided to reserve the bottom of the camera as a single magnetic surface, which would attach to its respective desktop clip. IThe camera’s octagonal design will now be intended as a means for the user to easily grip the camera, detach it from it’s magnetic desktop mount, and position it by angling it on a flat surface,

The fabric hinge will keep the two main 3D printed pieces in place, and the snap-fit closure at the front will keep the two pieces locked close.