


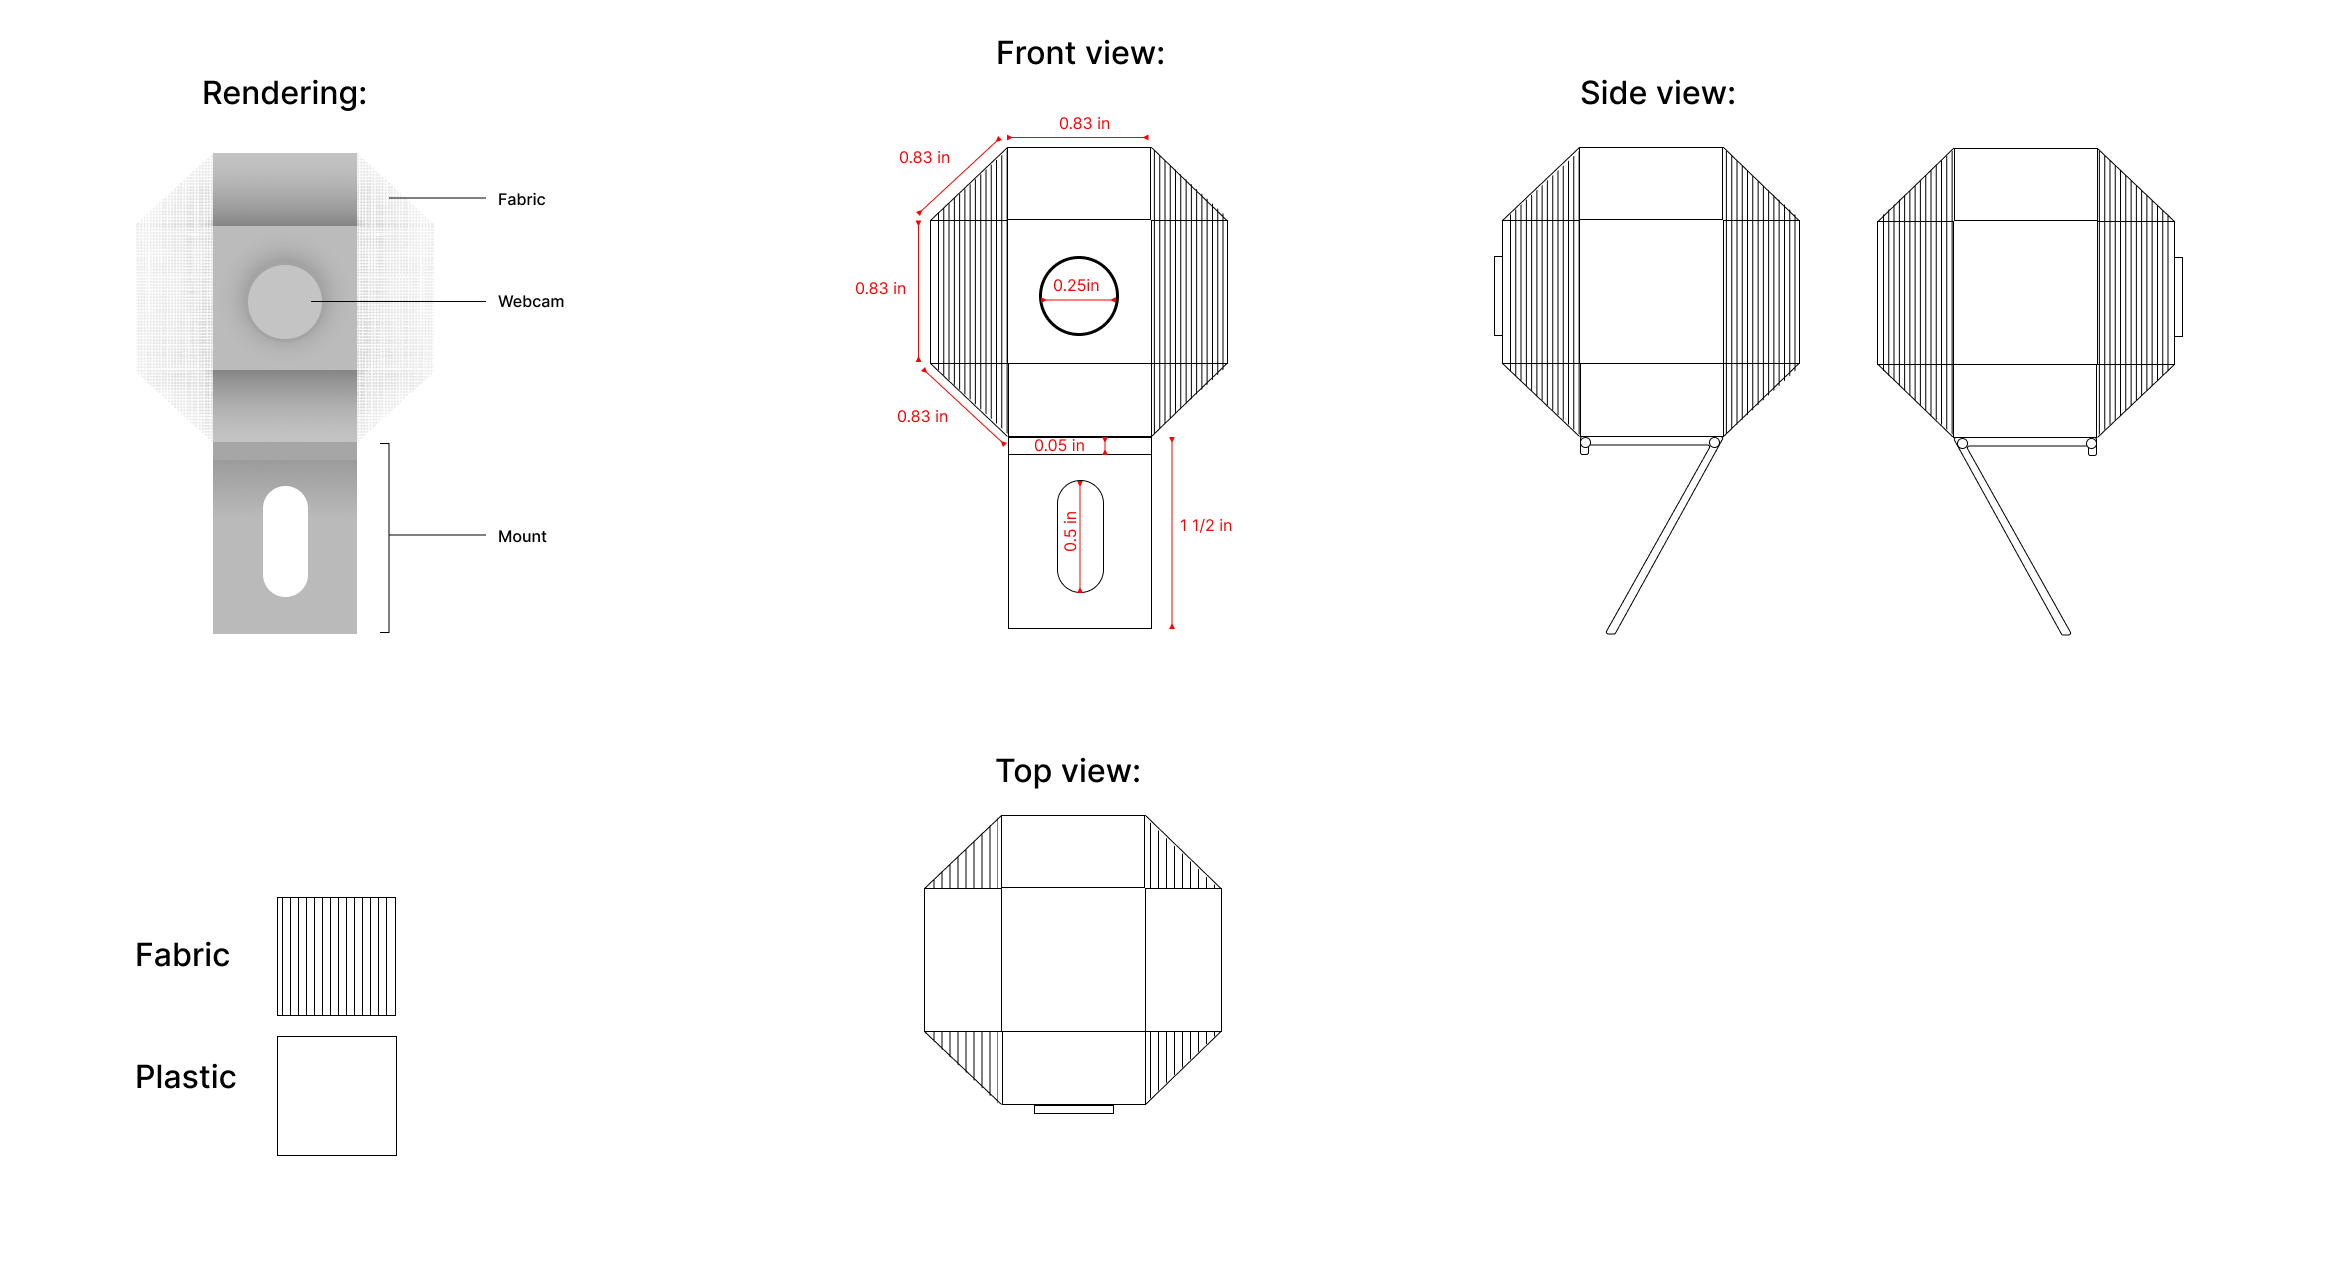
Our team decided to chose the honeycomb iteration of our video cam concept because it was the most viable design option for our persona.
This concept features a honeycomb-like shape that serves as the form of the entire video camera. Unlike conventional video camera that needs to be propped on a laptop or a monitor, this camera is meant to be an independent gadget that connects to the computer via bluetooth. It is purposely detached from the body of the computer, so as to give the user extra mobility when using the camera to point at objects around their space. The multiple faces helps helps to give the user different angle options for how to face the camera lens, and it is also easily placed on various objects (such as a pile of books) so as to be resourceful of the user's objects in customizing their desired height/angle for the camera.
Orthographic View
Division of Labour
Trimming/Cutting: Kaitlyn
Assembly: Anna
Finishing: Sahil
Each team member for this phase of the project chose to work on each particular phase of the project, as per outlined above.
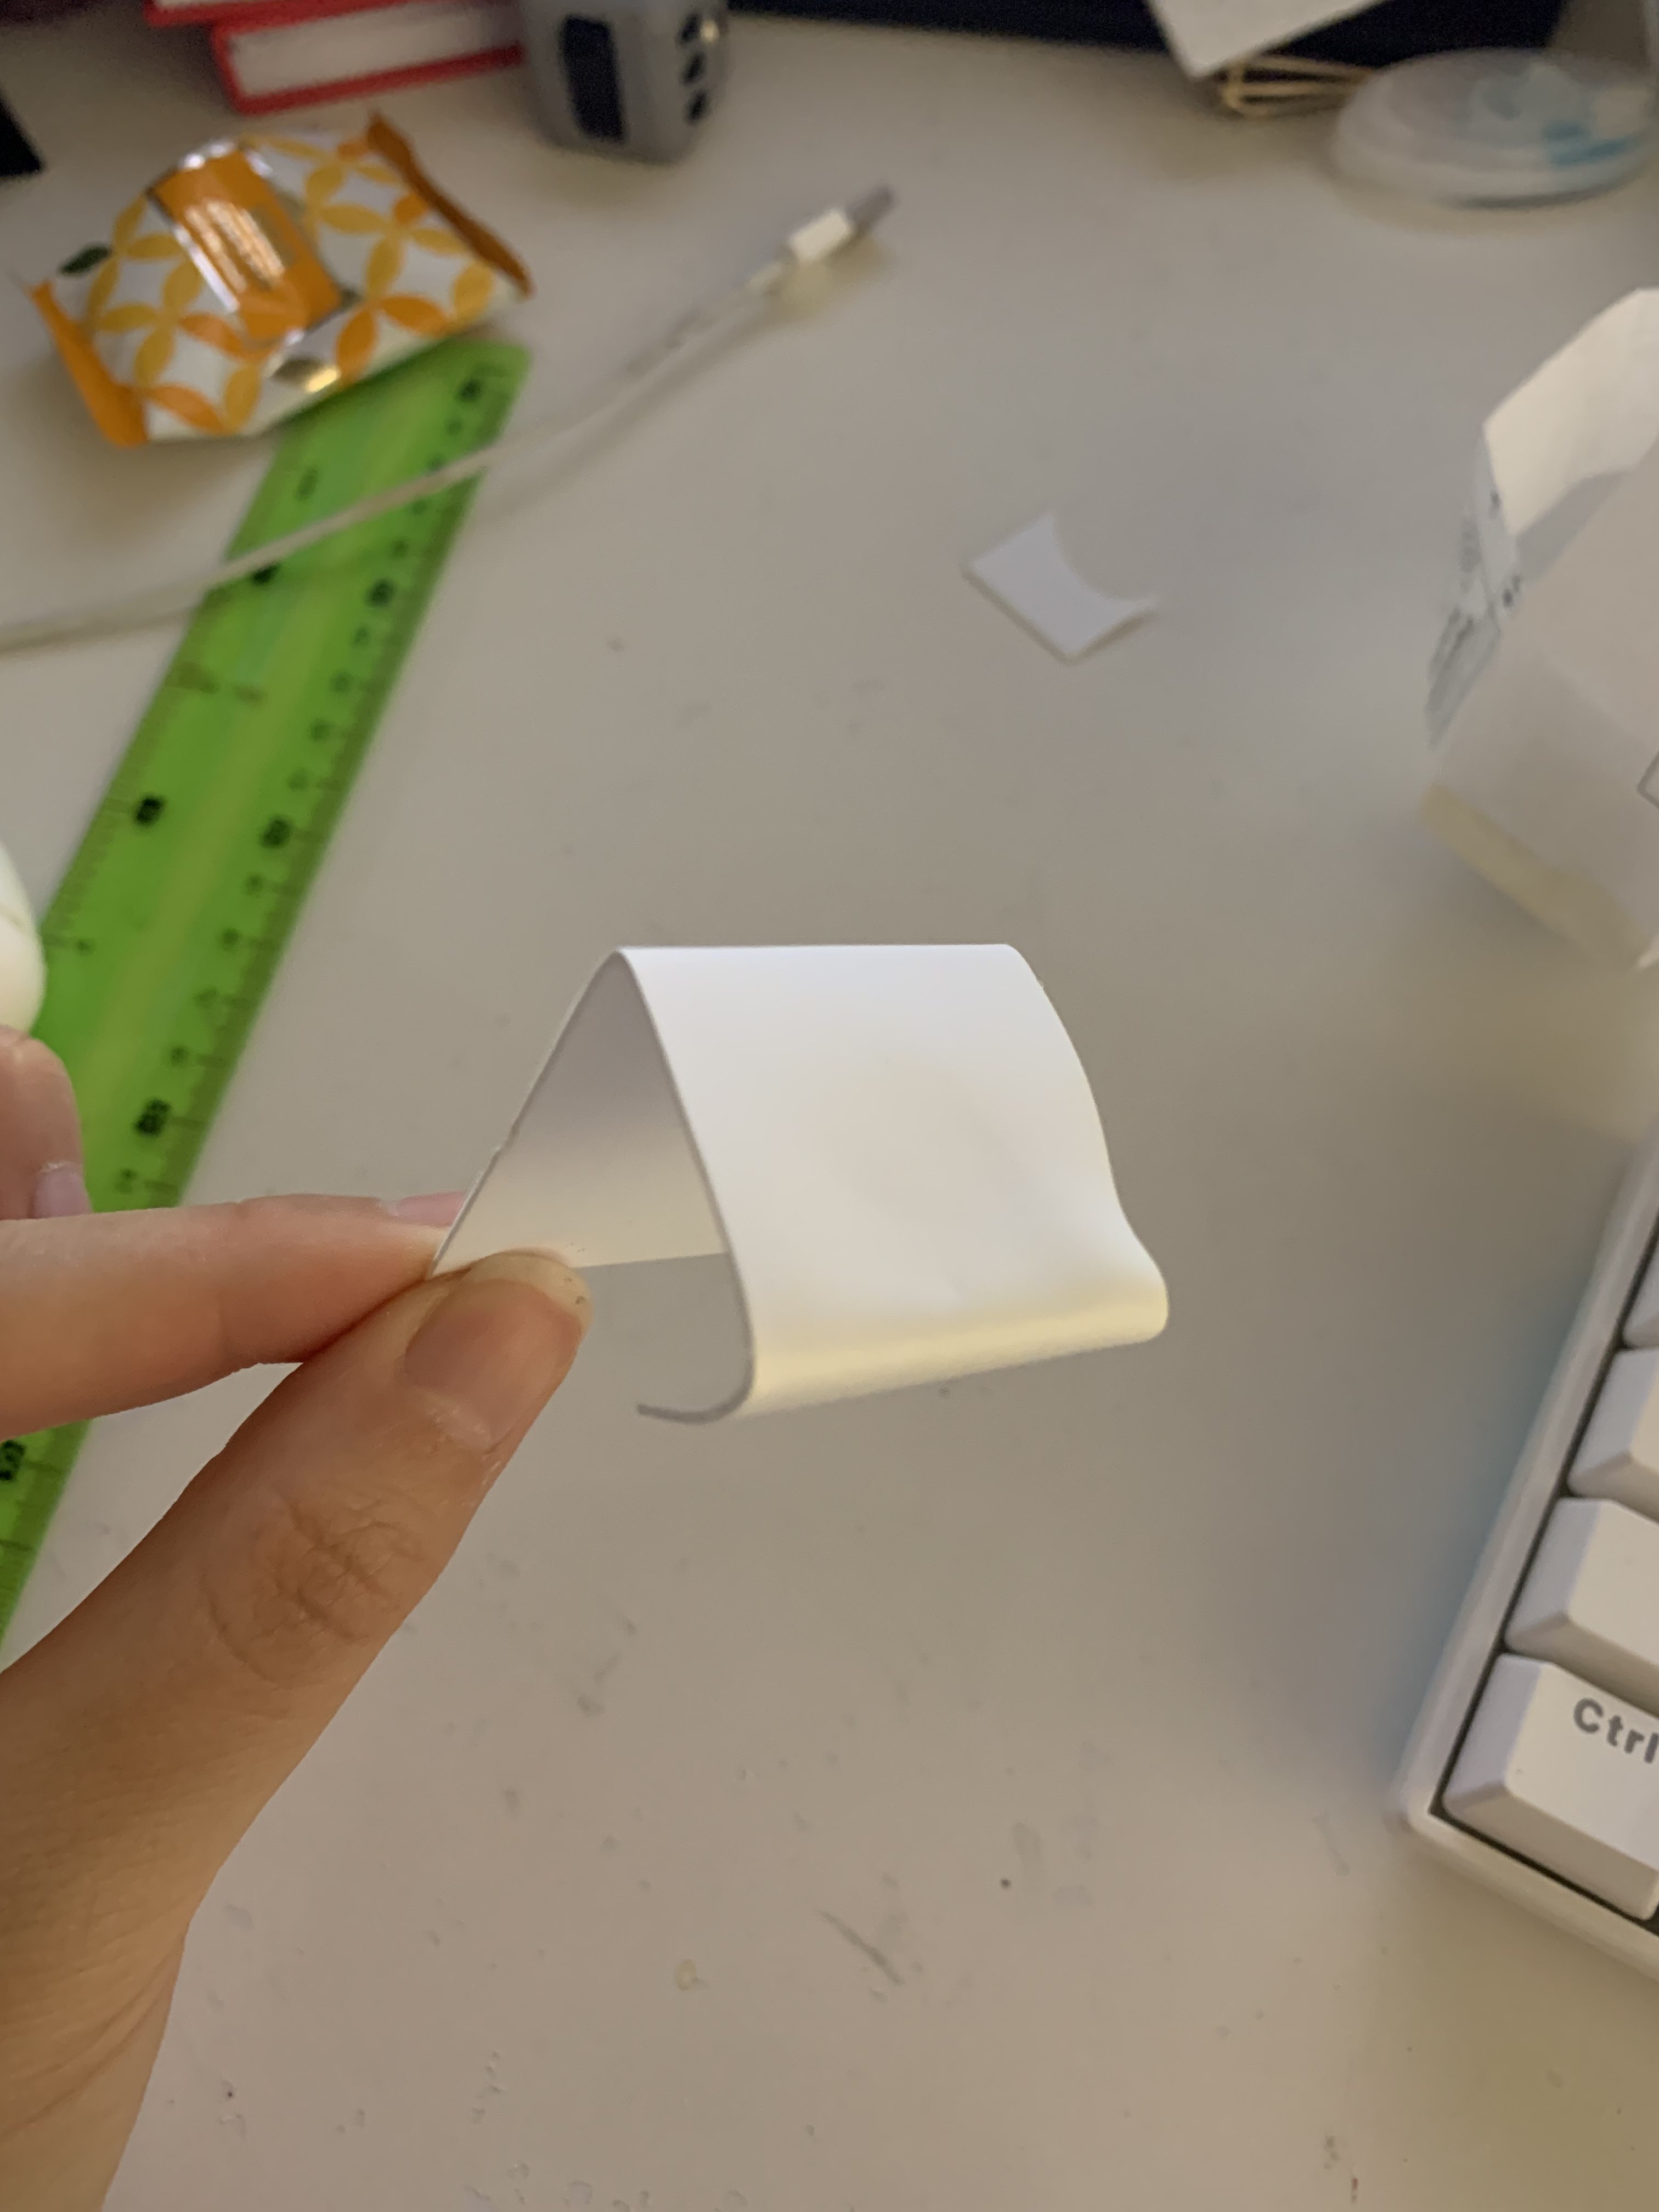
Testing with a Paper Model
We first tested out our concept with a low fidelity paper prototype to have a feel for the dimensions, size and form of the model which we were eventually going to do a high fidelity prototype of.
Trimming/Cutting (Kaitlyn)
I used a penknife to cut through the Polystyrene sheets (0.04 inch thick), making 2 thick strips of the polystyrene material that would make out the rigid form of the honeycomb exterior. I then cut out 4 pieces of fabric in an oval-like shape from a cotton canvas sheet with a pair of scissors.
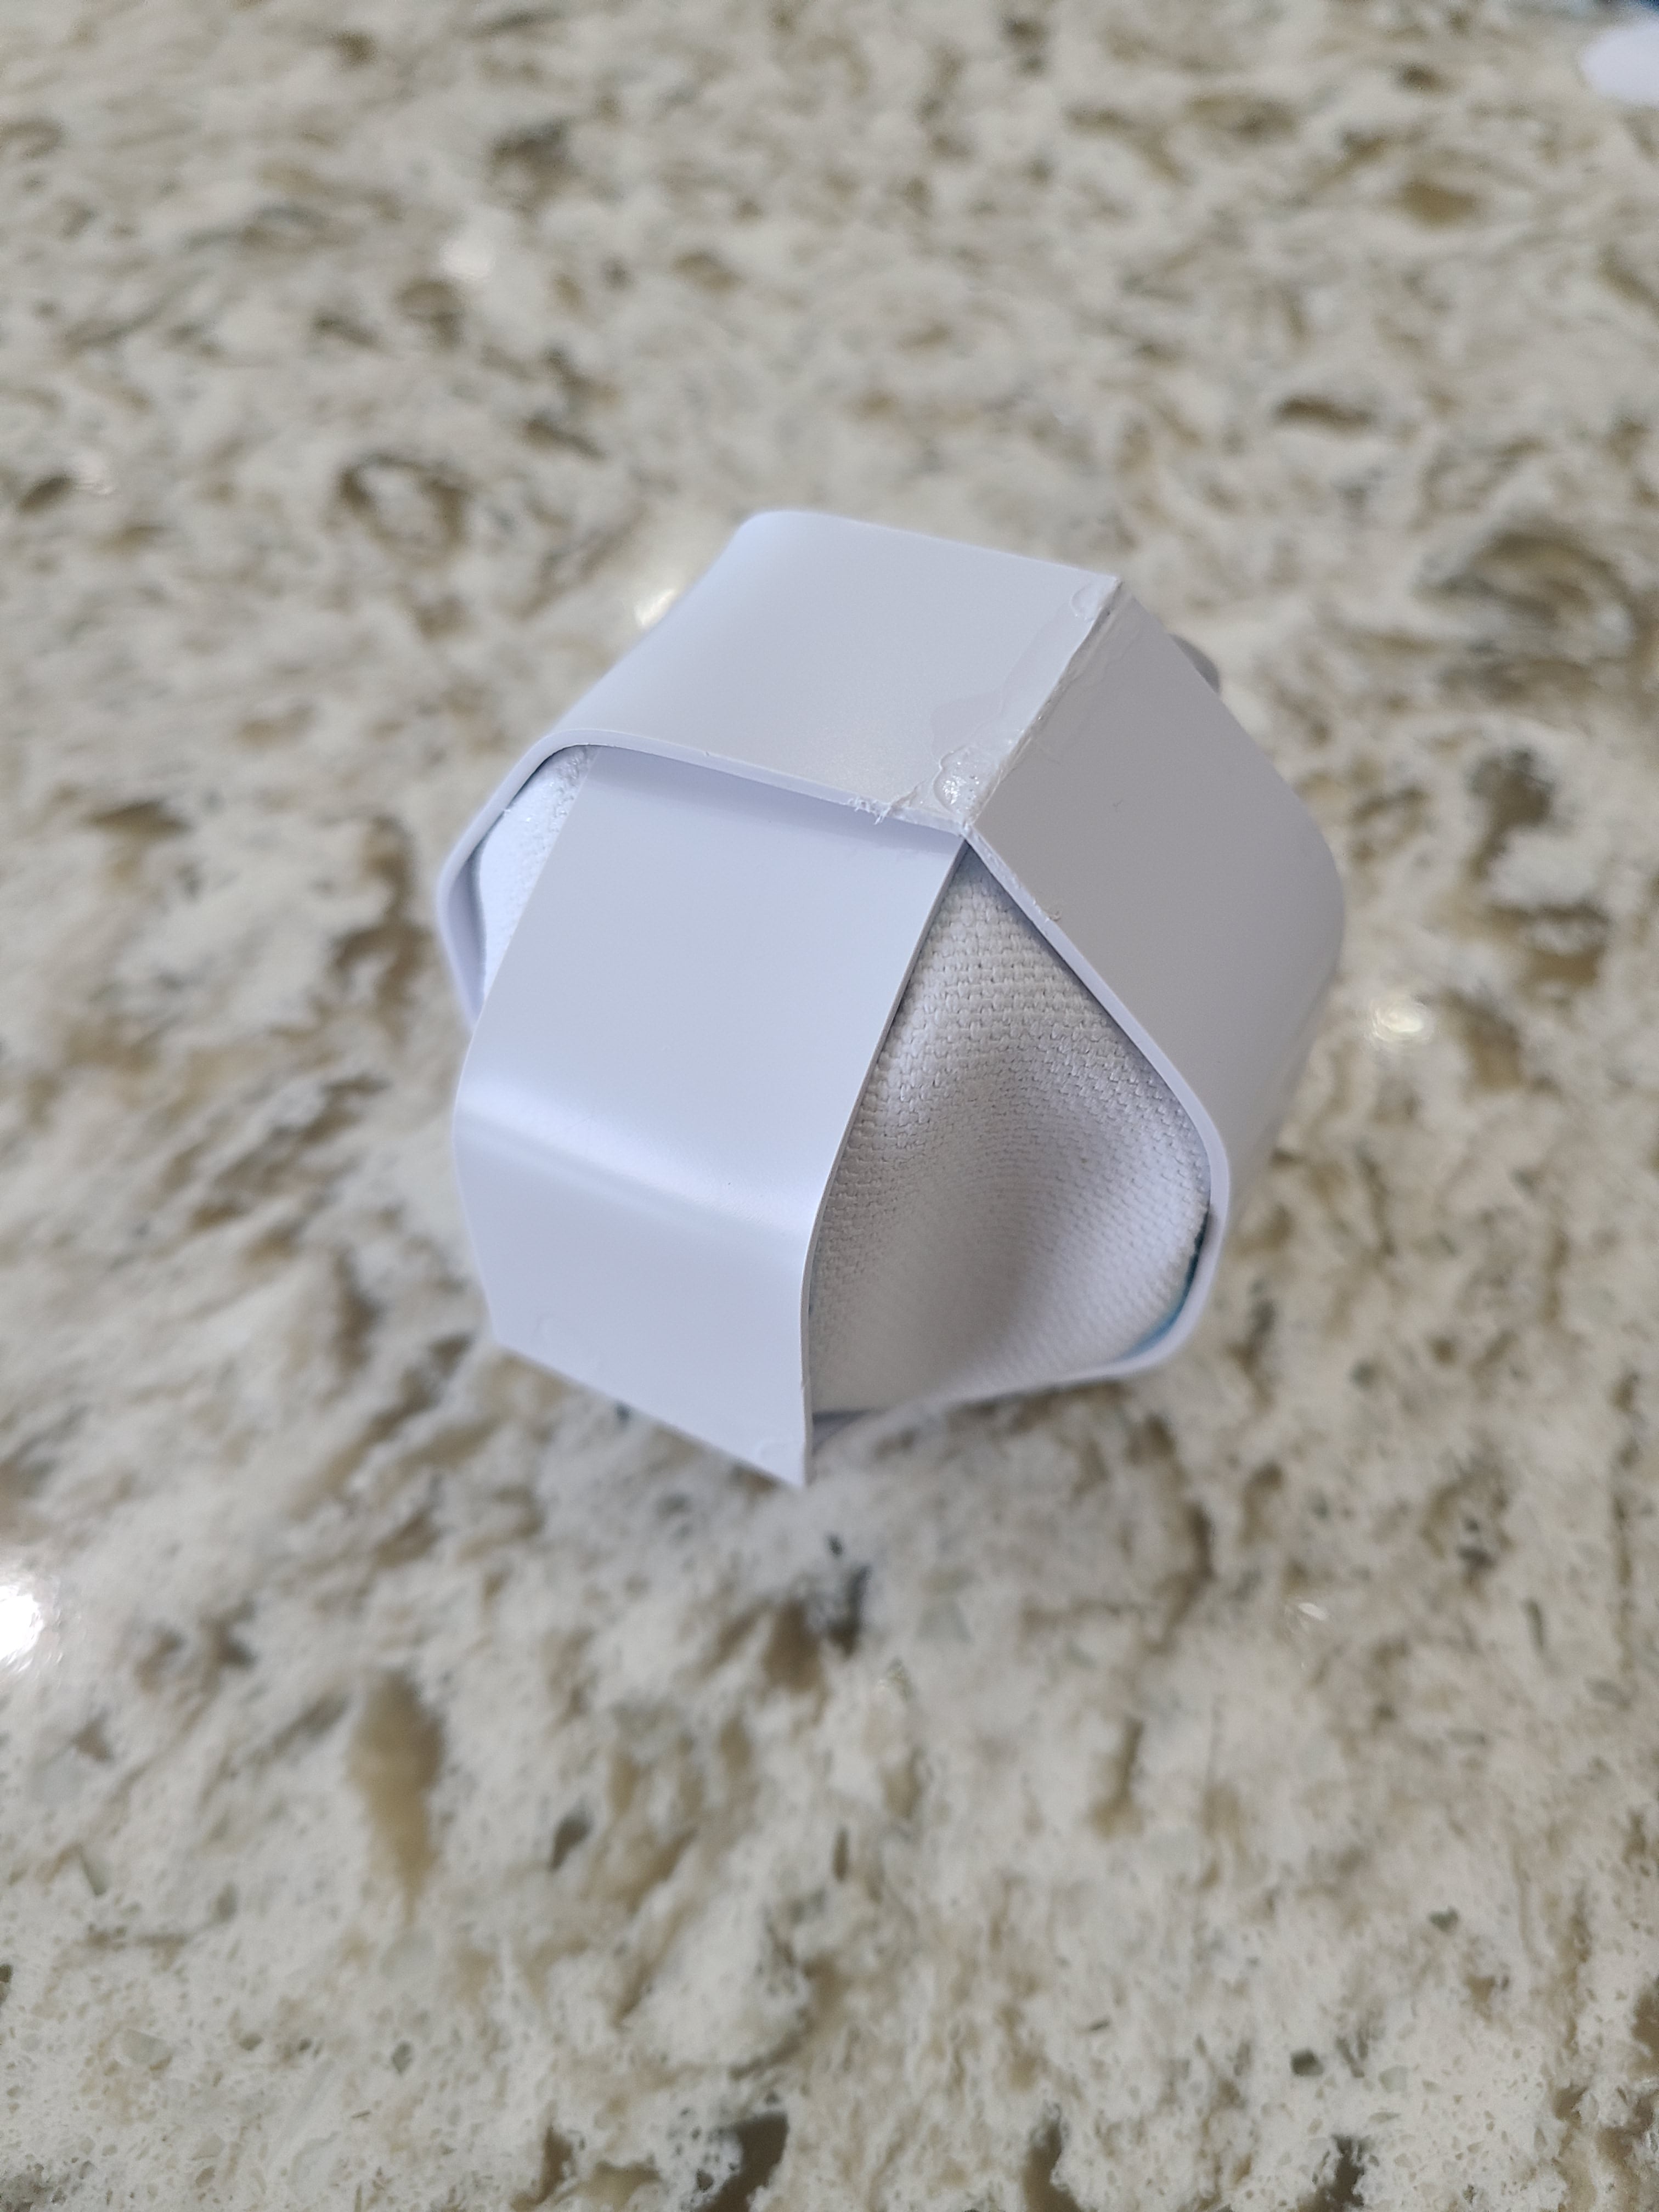
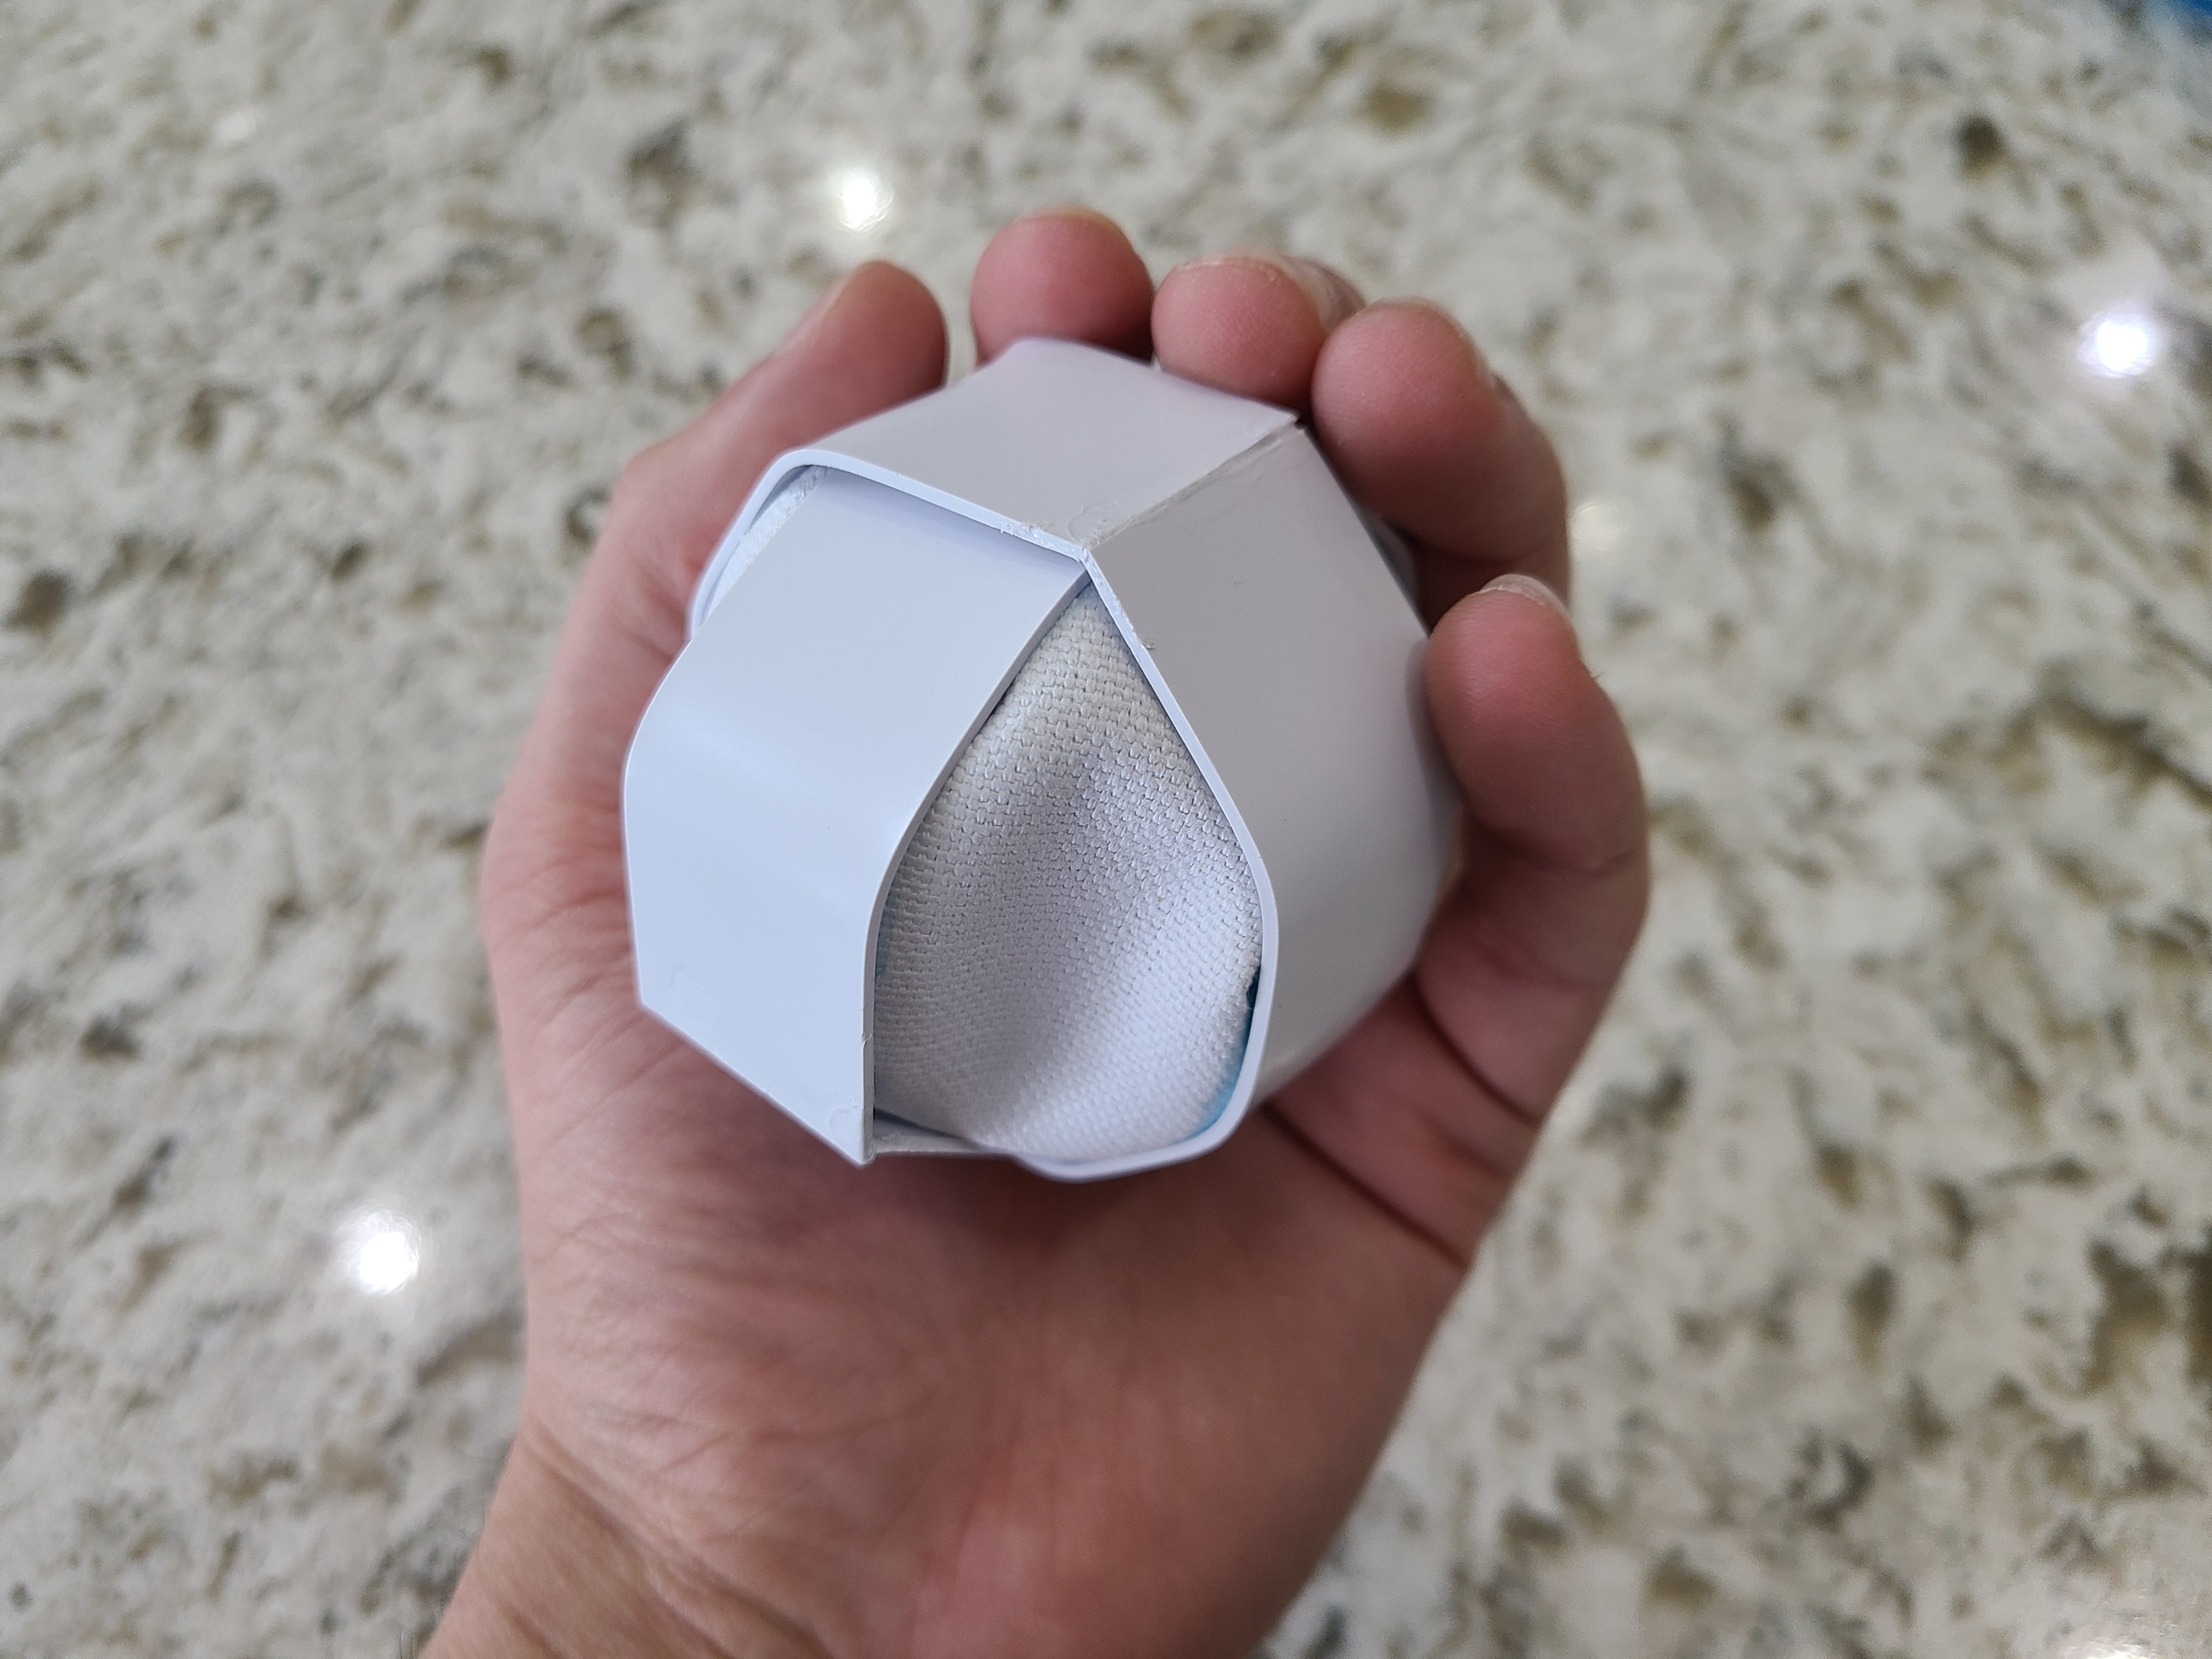
Assembly (Anna)
I made equal 7 folds per each polystyrene sheet to make 8 1" by 1" squares that could be bent into a honey-comb shape. Using a hairdryer, I positioned the heat onto the creases to create deeper folds. I used methyl adhesive to connect each strip end to end, and then placed the two pieces interwining together to create a 3D form with double sided tape. I then used glue to fill in the gaps in the honeycomb shape with the oval cutouts of the cotton canvas.
Finishing (Sahil)
For finishing, I used a 180-grit sandpaper to sand down the excess glue to smooth out the form of the prototype.